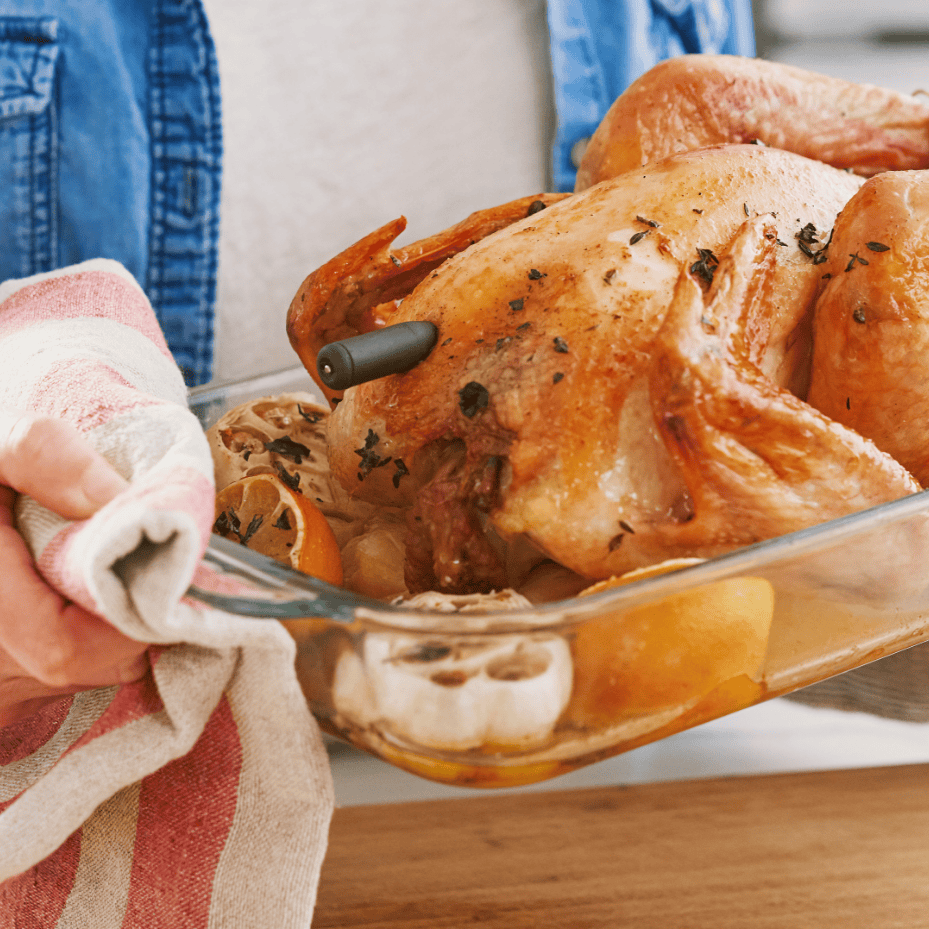
Thanksgiving and festive dinners often hinge on the perfect roast turkey. Achieving that golden, juicy perfection can be a daunting task, but with the advent of connected cooking thermometers like Orka’s Meat°It 3, even novice chefs can roast a turkey like a pro.
The key to a perfectly cooked turkey lies in its internal temperature. Cooking it just right – not too raw nor overcooked – is a delicate balance. A connected thermometer, such as the Meat°It 3, offers precise and real-time monitoring of your turkey’s internal temperature, ensuring that every bite is safe and delicious.
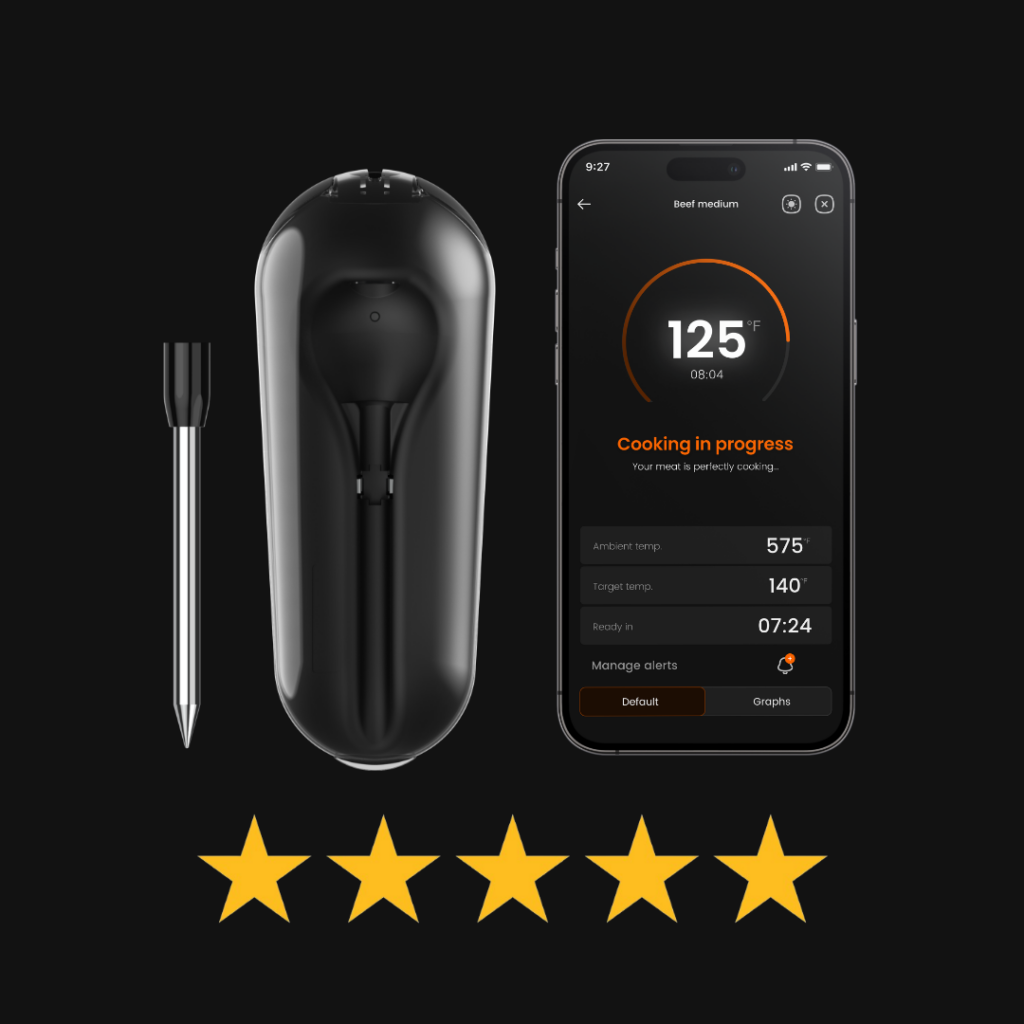
The Meat°It 3 thermometer consists of a wireless probe, a docking station for storing and activating the probe, and a removal key. Compatible with all hobs, including induction, as well as barbecues and ovens, it’s perfect for various cooking methods, from fast searing to slow roasting. Whether you’re roasting a turkey for the first time or just need your annual Thanksgiving and holiday-season refresher, this guide will help you through the steps to a perfect turkey: Crispy skin, tender meat, well-seasoned, and so delicious you’ll wonder why you waited a year to eat it again.

Step 0: Setting Up Your Meat°It 3 Thermometer
- Charge the Probe: remove the batteries stick, it will allow it to charge. A LED light on the docking station indicates the battery level.
- Activate the Probe: Remove it from the docking station by the tip for activation.
- Install the App: Download the Meat°It 3 app from the App Store or Google Play. Create an account or use “Easy mode” for limited access.
- Pair with Bluetooth: Ensure Bluetooth is enabled on your phone. For Android, activate GPS location for effective pairing.
Step 1: Preparing Your Turkey
Before you start, ensure your turkey is thawed and at room temperature. Season it according to your favorite recipe. This is where your culinary skills shine, whether you’re a home cook or a seasoned chef.
Any turkey will taste better if brined in salt for a day or two before cooking. Brining your turkey is not necessary but it is a good idea. This method has become popular over the last few years and involves immersing the turkey in a salt-water solution or dry-brining in salt for a day or so before cooking.
Step 2: Setting Up Your Connected Thermometer
The Meat°It 3 thermometer is a marvel in the realm of cooking technology. It’s wireless, making it incredibly versatile and convenient. To start, remove the probe from the dock and insert the Meat°It 3 probe into the thickest part of the turkey breast, ensuring it doesn’t touch the bone. This position is crucial for an accurate reading.
Step 3: Connecting to Your Smartphone
Once you are logged in, the app automatically searches for probes within range. Make sure Bluetooth is activated. When your probe is detected, click on it to program a cooking level. The probe connects within a range of 100 ft. The Meat°It 3 app is user-friendly, offering an intuitive interface.
Step 4: Setting a “standard” cooking program
Enter the type of meat (turkey) and your desired doneness. For turkey, the USDA recommends an internal temperature of 165°F to ensure it’s safely cooked. Use the app to select your cooking device, type of meat, cut, and desired cooking level. You can choose a standard or personalized program, adjusting temperatures up to 212°F.
Step 5: Monitoring the Cooking Process
As your turkey cooks, monitor the temperature remotely using your smartphone. This feature is particularly advantageous for those long cooking times turkey requires. It allows you to enjoy the company of your guests or manage other cooking tasks without being tethered to the oven.
Option: Connect a second device via Wi-Fi to extend the probe’s range, especially useful for large setups or outdoor cooking.
Step 6: Setting Alarms
Set alarms for specific temperatures or cooking times. The app alerts you when your turkey reaches the desired internal temperature. For example, it is a good idea to baste the turkey every 45 minutes, so you can set the alarms every 45 minutes to remove the turkey from the oven, close the oven door (don’t let that heat out!), and baste the turkey all over. To baste, tilt the pan if needed and use a turkey baster or spoon to scoop up the pan liquids and drizzle them on top of the turkey. Basting with pan juices cools the surface of the turkey and slows down cooking, which in turn keeps the breast meat cooking at close to the same rate as the legs and thighs. This helps crisp up the skin and turn it a beautiful deep golden brown.
Step 7: Reaching the Perfect Temperature
The app notifies you when cooking is almost done and then when the cooking is complete. Once the Meat°It 3 alerts you that your turkey has reached the desired temperature, it’s time to take it out of the oven. In every case, the meat should be at least 165°F when the turkey has finished cooking.
tilt the whole pan so the liquids inside the turkey cavity run out into the pan. Tent the turkey loosely with aluminum foil. Let it rest for about 20-30 minutes. Resting is crucial as it allows the juices to redistribute, ensuring your turkey is moist and flavorful.
Step 8: Remove the probe from the turkey
The key to remove the probe is located under the docking station. It was specifically designed to help you remove the probe when it is still hot without risking burning yourself. You can remove the probe before cutting the turkey.
Set alarms for specific temperatures or cooking times. The app alerts you when your turkey reaches the desired internal temperature. For example, it is a good idea to baste the turkey every 45 minutes, so you can set the alarms every 45 minutes to remove the turkey from the oven, close the oven door (don’t let that heat out!), and baste the turkey all over. To baste, tilt the pan if needed and use a turkey baster or spoon to scoop up the pan liquids and drizzle them on top of the turkey. Basting with pan juices cools the surface of the turkey and slows down cooking, which in turn keeps the breast meat cooking at close to the same rate as the legs and thighs. This helps crisp up the skin and turn it a beautiful deep golden brown.
Step 9: Cleaning and Maintenance
After use, clean the probe with water and soap, carefully handling the ceramic part. You can also put your probe within your washing machine.
Additionally regular system updates via the app ensure optimal performance. If you have validated the auto-update you will be notified by the application.
Advantages of Using the Meat°It 3 Thermometer
Precision Cooking
With the Meat°It 3 thermometer, you can cook your turkey to the perfect medium rare temperature, achieving that juicy tenderness. The precision of this thermometer eliminates the guesswork, ensuring your turkey reaches the ideal internal temperature.
Versatility
The Meat°It 3 thermometer isn’t just for turkey. It’s versatile enough for a wide range of meats, from chicken to pork to salmon. It can handle various cooking temperatures, making it an essential tool for any meat-cooking endeavor.
Convenience and Connectivity
The wireless design of the Meat°It 3 thermometer provides unparalleled convenience, especially for outdoor cooking scenarios like barbecues or smoking meats. Its Bluetooth connectivity allows you to keep an eye on your cooking from a distance, making it a perfect companion for Weber grills and other outdoor cooking setups.
Health and Safety
Cooking meat to the right temperature isn’t just about taste; it’s about safety too. The Meat°It 3 thermometer ensures that your turkey reaches the safe internal temperature, reducing the risk of foodborne illnesses.

Conclusion: Elevating Your Cooking Experience
In conclusion, a connected thermometer like the Meat°It 3 transforms the daunting task of cooking a turkey into an enjoyable and foolproof culinary experience. Whether you’re aiming for that perfect medium rare steak, a well-cooked chicken, or a juicy turkey, this tool ensures your meats are cooked safely and deliciously every time.
By integrating this advanced cooking technology into your kitchen, you elevate not just the quality of your food but also the enjoyment and ease of cooking. Embrace the future of culinary precision with the Meat°it 3 thermometer – your ally in achieving culinary excellence. You can check out our article on “Protein Denaturation and the Maillard Reaction” to understand more on the science behind it.